Sun 7 Apr 2013
Patience is the Art of Baking Bread
Posted by Clare under American in Ireland, Baking, Expats in Ireland, Farmer's Markets Dublin
[7] Comments
When I first moved to Ireland just over three years ago, I was a wide-eyed American girl with sense of adventure and an open mind…or so I thought. After the initial excitement of living in a new country wore off, I started to realise that living in Ireland meant I would be getting a lot of practice working on something I wasn’t so good at: Patience.
I recall the first time I strolled down to the post office during lunch, just to find out many post offices are closed during the 1-2 PM lunch break. Seriously? How does this make any sense? Most people use their weekday lunch time to run errands, like go to the bank, drop off the dry cleaning and GO TO THE POST OFFICE. GROAN!
Particularly when I lived in Drogheda, a trip to the grocery store could take twice as long as planned thanks to the chatterboxes that work the cash registers. Oh Mary, you’re looking well! What are ye up to? Aw that’s a lovely restaurant, we love it. Make sure to get the steak and….oh sure treat yourself, you deserve it! This could go on for minutes…tens of minutes. Never mind there’s a half-dozen of us in line behind Mary, waiting to get back to work or back to the car that’s sitting in the pay-by-the-hour car park.
During the really early days, I complained a lot. To the post office worker, to the chatterbox, to the bank lady who told me it would take 30 days to get my laser card in the post. Why? How can this be? What the…? It didn’t go over very well with those on the receiving end of my rants but moreover it was driving me mad. I wanted things to work MY way, which was about as likely to happen as a Dublin bus arriving to a stop on time.
In time I started to accept the fact that an entire country was not going to bend to my will and do things just to suit my standards. Sure, things still irritate me – I recently spent 45 minutes getting a “personalised” assessment from a trainer at my gym, only to find out they give everyone the exact same “personalised” workout afterward – but I’m developing my patience and learning to adjust.
In some ways it’s a lot like baking bread, something I’ve only started doing recently. With cooking you can bend a dish to your taste – add a bit more of this, a little touch of that – and it won’t ruin the final result. But baking really requires strict adherence to the rules (or the recipe, in most cases!) and a helluva lot of patience.
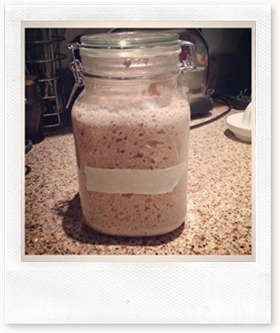
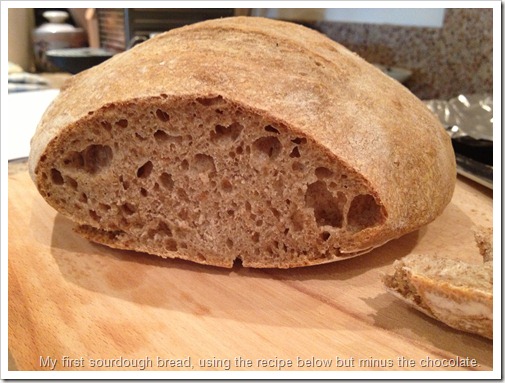
Inspired by my food blogger friends Caroline Bibliocook and Roseanne LikeMamUsedToBake and the incredible Vlad & Peter of Arun Bakery, I recently tried my hand at making my own sourdough starter. Beginning the starter was easy, but the nurturing or feeding process required far more attention. Every 2-3 days I had to take some of the starter out, add in more flour and tepid water and keep watch over the jar. After 12 days, it was bubbling and ready to go. I then tackled my first-ever batch of sourdough bread, which required further diligence. It requires a first rise for 4-5 hours, and then an overnight proofing period which means a lot of planning, patience and timing things just right – a lesson that I’m also learning to apply to life as well.
Sourdough Starter
(This is from Paul Hollywood’s Bread, however I have made a few changes including using whole meal flour and not using an airtight container as he suggests)
1kg strong organic whole meal flour 
1 organic apple, grated with skin but not core
360ml tepid water
Large jar with a lid or cover – at least 1.5l
Day 1
Weigh out 500g of the flour and mix with the apple and water. Tip into a container and ensure that the mix comes no more than one-third of the way up (if it exceeds this, tip it out and find another container. You have been warned). Mark the level of the mix on the outside so you can see whether it has risen; cover (my jar has a lid but it is not air-tight, and it worked fine) and leave to ferment for three days.
Day 4
After 3 days the mix should smell a bit sweet, like cider perhaps, and should have darkened somewhat. It should also have started to grow (which you can check by seeing how far above the line on the jar it has risen). Discard half of the mix and tip the rest out into a bowl. Add 250g of flour and 170ml of water and mix thoroughly before returning to the jar. This is called feeding and it happens a lot. Think of your starter like a plant that needs to be cultivated. Leave for a further two days.
Day 6
There should now be plenty of activity in the dough; which is to say that it should be bubbling away. If your starter is experiencing a post activity slump (characterised by a layer of liquid on the top), it may in fact be over-active and you need to stir in some more flour to return it to a thick consistency and leave it for a day to recover. (This happened to me, and I followed his instructions and it worked beautifully!)
Assuming you have an active starter, discard half of it again and mix in the final 250g flour along with enough water to return it to the consistency of a very wet, sloppy dough. This may be more, less or the same amount of water as you used before, depending on the temperature where you are cultivating your starter.
Leave it 24hrs. If the starter begins to bubble within this time (and wobbles like jelly when shaken) it is active and ready to use (hurrah!). If not, simply feed it again as from Day 4 and leave for another two days.
Clare’s note: At this stage I was not ready to bake bread yet (no time!) so I continued to feed it every three days using the first round method (throwing out half, then adding more flour/water) until Day 12, when I was ready to bake).
If you are using your starter on a very regular basis, say every two to three days, you can leave it at room temperature; feeding it whenever you want to make a loaf. If, like me, you make sourdough every week or two, then keep it in the fridge, remembering to bring it up to room temperature 24hrs before you intend to use it and, if it seems inactive, feeding it as well.
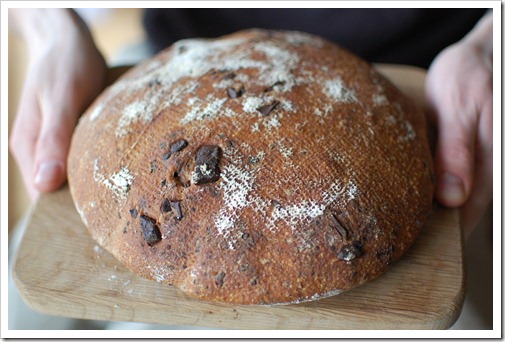
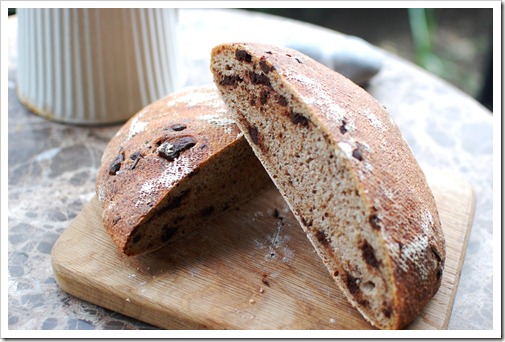
Dark Chocolate-Studded Sourdough Bread (makes 2 rounds)
(Base bread recipe adapted from Paul Hollywood’s Basic Sourdough recipe)
750g strong white bread flour, plus extra for dusting
500g sourdough starter
15g salt (I used Cornish Sea Salt)
350-450ml tepid water
Olive oil for kneading
400 grams of chopped dark chocolate (I recommend no darker than 70%, you want something with some sweetness to offset the sour of the bread)
Put the flour, starter, and salt into a large bowl.
Add 350ml water and begin mixing with your hands, adding more water if you need to, until you have formed a soft rough dough, and picked up all the flour from the sides of the bowl.
Coat the work surface with a little olive oil, then tip the dough onto it and begin to knead. Keep kneading for 5-10 minutes. Work through the initial wet stage until the dough starts to form a soft, smooth skin.
When your dough feels smooth and silky, put it into a lightly oiled bowl and cover with a tea towel.
Leave to rise at 22-24C (no cooler than 15C and no warmer than 25C) for 5 hours, or until at least doubled in size. (Note: I used my hot press)
Cover two trays with cloths, and dust them heavily with flour.
Tip the risen dough onto a lightly floured surface, and fold it in on itself a few times to knock out some of the air. Divide the dough into 2 pieces, and divide the chopped dark chocolate into two equal piles. Take one of the dough pieces and work it over one pile of chopped chocolate and knead so that the chocolate gets incorporated into the dough. Do this with the second dough piece and second pile of chocolate. Shape them into a ball and place each into prepared proofing baskets or onto parchment-lined & floured baking trays.
Leave to prove at 22-24C for 13 hours, or until the dough is doubled in size and springs back when lightly prodded with your finger.
When the dough is ready, heat your oven to 200C and place a cake tin or roasting tin on the floor of your oven (under the lowest rack). Put the kettle on and boil some water. Line 2 baking trays with baking paper.
Transfer your loaves to the prepared baking trays by tipping them out of the basket onto the trays, or if you just used trays leave them on there – they’re ready for the oven. Place the baking tray or trays into the oven and before you close the door put about a 1/2 of a cup of the boiling water into the bottom roasting tin and then IMMEDIATELY close the oven door. The steam created from doing this will give the bread a nice, crunchy crust.
You may have to bake these in batches depending on your oven size, but bake each round for 30-40 minutes or until it sounds hollow when you take the underside of the bread.


Added to your list is banks opening at 10 am and closing at 3 pm. Maddening! But that bread looks gorgeous and worth the wait.
Sourdough and dark chocolate are a match made in heaven. A few chopped dried apricots now, and you have breakfast in a slice!
Sourdough is such a special bread – worth the planning, effort and patience – a bit like Ireland, really 🙂
I love reading your perspective on life in Ireland. I still want to live there someday, but it seems as though that’s not in the immediate future, so I enjoy living vicariously through you. 🙂 It sounds like you’re getting far more patience than I ever had!
What is a hot press? It’s mentioned in an Irish book I’m reading at the moment as well.
@Liza in Ann Arbour, a hot press is a cupboard/cabinet where linens (sheets and the like) are aired there used to be the tank with hot water which was warmed from the range(stove, fueled by turf) once upon a time and thats more than likely where the name came from…
This article made me laugh so much. I love that there are blogs like this that I can relate to and make me feel like I’m not completely alone in my own “American in Ireland” adventure.
Can’t wait to try the bread recipe! I’m just learning now as well. Frustrating, but very satisfying when you get it right!